Working with streams is inherently different from working with basic values and objects; thus, the task of testing them is different, as well.
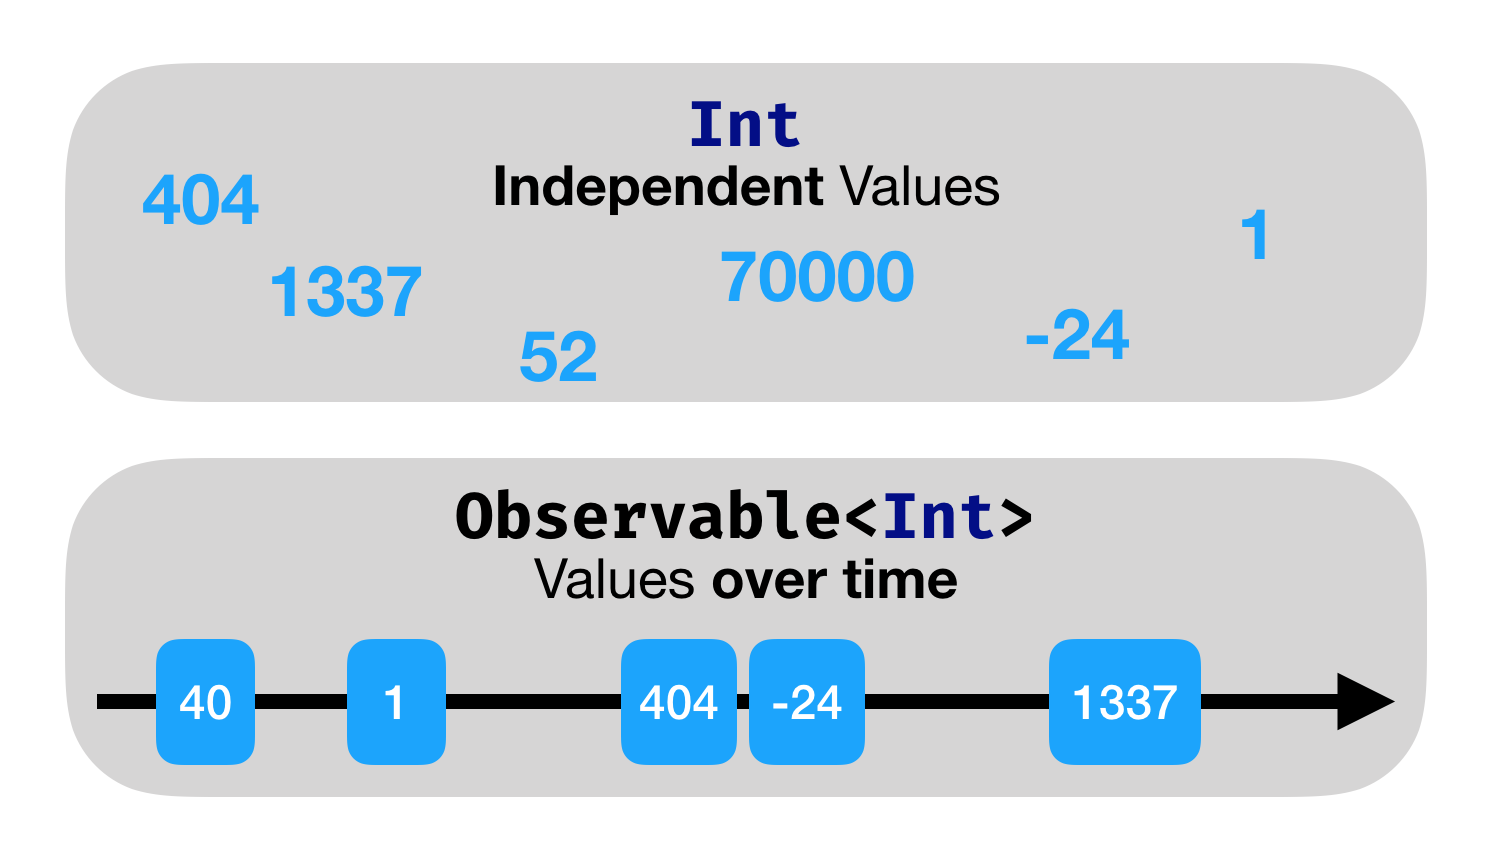
Values are single and independent, they don’t have any representation or concept of time. Observable, on the other hand, emit elements over time.
RxBlocking is one of the two testing frameworks available with RxSwift, and it follows a simple concept: It lets you convert your Observable stream to a BlockingObservable, a special observable that blocks the current thread, waiting for specific terms dictated by its operators.
RxBlocking provides several operators, with the most useful ones being:
-
toArray(): Wait for the sequence to terminate and return all results as an array. -
first(): Wait for the first element and return it. -
last(): Wait for the sequence to terminate and return the last item emitted.
Example:
func testDenominatorStartsAt4() throws {
  XCTAssertEqual(try viewModel.denominatorText.toBlocking().first(), "4")
}-
It’s aimed at testing finite sequences, meaning that, if you want to test the first element or a list of elements of a completed sequence, RxBlocking will prove to be very useful. However, in the more common case of dealing with non-terminating sequences, using RxBlocking won’t provide the flexibility you need.
-
RxBlockingworks by blocking the current thread and actually locking the run-loop. If yourObservableschedules events with relatively long intervals or delays, yourBlockingObservablewill wait for those in a synchronous matter. -
When you’re interested in asserting time-based events and confirming they contain the correct time stamp, RxBlocking is no help as it only captures elements and not their times.
-
When testing outputs that depend on asynchronous input, RxBlocking won’t be useful as it blocks the current thread, for example, when testing an output that needs some other observable trigger to emit.
RxTest is an entirely different beast to RxBlocking, with the main difference being that it is vastly more flexible in its abilities and in the information that it provides about your streams. It’s able to do this because it provides its very own special scheduler called TestScheduler.
RxSwift uses schedulers to abstract and describe how to perform work, as well as to schedule the emitted events resulting from that work.
RxTest provides its own custom scheduler called TestScheduler solely for testing. It simplifies testing time-based events by letting you create mock Observables and Observers so that you can “record” these events and test them.
var scheduler: TestScheduler!
var disposeBag: DisposeBag!

// Then, at the end of setUp(), add the following lines to create a new TestScheduler and DisposeBag before every test:

scheduler = TestScheduler(initialClock: 0)
disposeBag = DisposeBag()
Start by adding your first RxTest-based test:
func testTappedPlayPauseChangesIsPlaying() {
  // 1
  let isPlaying = scheduler.createObserver(Bool.self)

  // 2
  viewModel.isPlaying
    .drive(isPlaying)
    .disposed(by: disposeBag)

  // 3
  scheduler.createColdObservable([.next(10, ()),
                                  .next(20, ()),
                                  .next(30, ())])
           .bind(to: viewModel.tappedPlayPause)
           .disposed(by: disposeBag)

  // 4
  scheduler.start()

  // 5
  XCTAssertEqual(isPlaying.events, [
    .next(0, false),
    .next(10, true),
    .next(20, false),
    .next(30, true)
  ])
}-
Use your
TestSchedulerto create aTestableObserverof the type of elements that you want to mock — in this case, aBool. One of the main advantages of this special observer is that it exposes an events property that you can use to assert anyeventsadded to it. -
drive()your isPlaying output into the newTestableObserver. This is where you “record” your events. -
Create a mock
Observablethat mimics the emission of three “taps” into the tappedPlayPause input. Again, this is a special type of Observable called aTestableObservable, which uses yourTestSchedulerto emit events on the provided virtual times. -
Call
start()on your test scheduler. This method triggers the pending subscriptions created in the previous points. -
Use a special overload of
XCTAssertEqualbundled with RxTest, which lets you assert the events in isPlaying are equal, in both elements and times, to the ones you expect. 10, 20 and 30 correspond to the times your inputs fired, and 0 is the initial emission of isPlaying.

RxTest uses an internal mechanism for converting regular time (e.g., a Date) into what it calls a VirtualTimeUnit (represented by an Int).
continue...